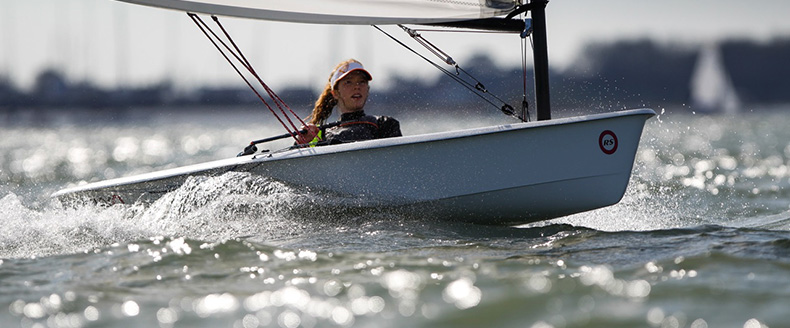
Welcome to the International Class Association website for the RS Aero. Here you will find all there is to know about the RS Aero including the latest news, how to register your boat, and links to relevant documents.


| Home >> Technical >> Joining Sail Halyard & Halyard Tail |
I did my own from Marlow Excel Racing 5mm , stripped tapered and works like a charm now. I cannot stand the "bumpy" transition. After my third day out, I knew it was needed.
Yes, it is a bit more expensive, but for $90 you get all good said and done with years of good use.
Really don't mind a $90 investment on a $7,500 boat when I know is going to last years, it is going to be light, no chafing on the spars or hardware, does not absorb water and it will be reliable.
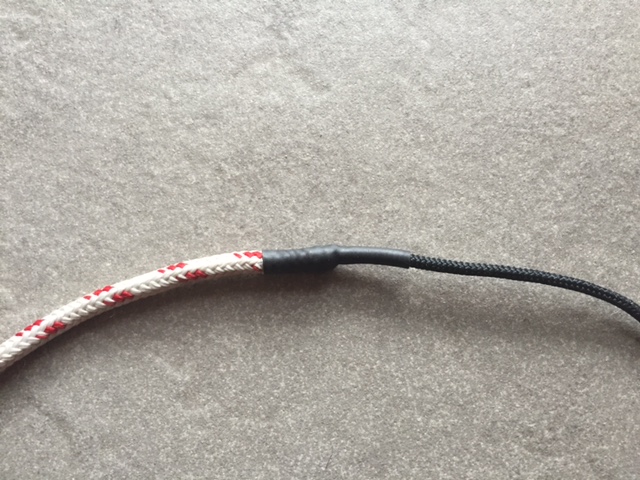
Here is the before and after:

Cheers,
Rod
Reply
Yes, it is a bit more expensive, but for $90 you get all good said and done with years of good use.
Really don't mind a $90 investment on a $7,500 boat when I know is going to last years, it is going to be light, no chafing on the spars or hardware, does not absorb water and it will be reliable.
Here is the before and after:
Cheers,
Rod
Reply
10/09/2015 22:23:05
velasailingsupply
Posts: 7
I've found that the heat shrink sleeving is good for only 2 - 3 months; sailing most Sundays & Wednesday evenings, 30 - 40 hoists & drops.
This is hardly surprising as it is not intended for such hard abrasive use.
When I found the heat shrink on a 2nd halyard I'd had made up with cored rope severely worn I bound it with electrical tape for an immediate get sailing fix. This has stood up to about 1 month wear.
Reply
10/09/2015 21:38:56
Jonathan Rickels
Posts: 104
Apart from the issues discussed above, I've had problems with the stainless insert in the fairlead at the top of the mast cutting through the tail and through the heat shrink sleeving I've used. Has this insert been used on all masts, or is there an option of using a fairlead without an insert? I'd rather replace the fairlead from time to time rather than having problems with the halyard. Alternatively has anyone filed down the sides of the insert to avoid the wear on the halyard?
Reply
Reply
27/08/2015 14:43:31
Andy Butler
Posts: 19
I found a good cheap solution was to:
- strip the outside cover off a short length of the RS supplied thicker halyard rope (the strength of this one is provided by the core). Seal so it doesn't fray.
- remove a short length of core from the stretchy black rope supplied (the strength of this one is provided by the outside cover, not the core)
- tie together as recommended (less bulk means the knots are much smaller)
- get a short length of other rope with a removable core / braided cover and remove the core so you just have a length of hollow braided rope to cover the knots and rope tails above. Slide it over the rope so it covers the knots and then stitch and whip both ends of this cover.
I've been using this for several months and it's proven to be a cheap and excellent solution for a small amount of work. It would of course be nice if it was supplied like this by RS!!...
Reply
Reply
28/05/2015 20:37:58
David-at-BroadwaterSC
Posts: 42
My plan is to buy 36 feet of 4mm double braid with a Dyneema core, strip all of the cover except for around 2-3 feet for the cleat and simply taper the cover into the Dyneema core.
Update - I wasn't excited about paying for 36 feet of Dyneema I don't need, and a good point was made about a stretchy tail, so instead I slipped a few feet of cover from some cheap polyester double braid over the black tail cord supplied with the boat, stitched the cover to the cord at the ends and covered the transition with heat shrink. Plus I still have black cord running down the black mast and not visible.
Reply
28/05/2015 17:15:20
ddubois
Posts: 8
Hi..to add an alternative which surely would have a better idea from day 1...
Despite best efforts on following the guide the knot I used to join the halyard and tail catches in the fair lead at the top of the mast so my local friendly chandlery did the following. Dyneema 4mm back spliced with a small eye, the back splice is the same length of the 5mm tail. Bobble threaded through the small eye and knotted. You end up with a one piece halyard with no join just a taper where the back splice ends It's simple and allows sail to hoist and fall smoothly. The back splicing does not double the thickness of the 4mm but it's about 6mm but is more than up for the job in cleating at the mast head cleat. The 4mm tail is thin enough to be gathered in the sail pocket.
It cost 25 quid but in my book worth every penny for the ease of operation. I hope this does not cut across class rules because it gives no advantage when sailing..
Martin 1490
Reply
Reply
14/05/2015 21:15:52
Martin
Posts: 13
Hi, I too found that my two part halyard was catching. Even if
I used it with no sail in testing, as my halyard was pre tied from RS as my
boat is one of the original demo boats. I have done the following. I first
retied the line giving longer tails (Only about 25mm) I then removed some of
the outer on the blue line and then pulled around a third through the other
side of it with a needle and then whipped it. After testing this it became
clear it was not just the tails coursing the problem but the angle of the blue
loop as it passes through the eye. This is inherent with sheet bends.
Reply
I then made the tail of the of the black line pass back through the lope of the blue line. This made a lope of the black line in the other direction to the blue and did the same with the tail end as the blue. This worked well but I would consider this as a permanent fix.
I have since done the following which seems to be the answer
I have bought Gottifredi Maffloli Evolution Race Blue (4mm as my blue is not
5mm) from LDC. Kingfisher 3mm Compact Braid from Dinghy Rope. Both are SK75
Dyneema, both are longer than the originals to be able to spice them. I have Brummel
lock-spliced eye on eye. (If I need to
replace either line I will cut it through its eye and splice a new bit on.)
I sailed on Monday with this setup and hosted and dropped a
7 twice and sailed for over two hours each time and it worked fine. I have also m-lubed the track and sail’s. The
sail went straight up and once it was un-cleated, it all but fell down at the
end of the sailing.
Now that the class rules have been published all of this is
within the rules.
Tools
Selma fids, 5mm, 3mm
Thin rod with a point (deck shoe lace needle).
How to create Brummel lock-spliced eye: Youtube
Reply
08/04/2015 23:38:56
1001
Posts: 1
I read this post prior to getting my boat and was concerned we might have a design flaw. However once I had the boat I found the halyard join passes through the top of the mast with no problems.
Cliff
Reply
15/03/2015 20:49:24
Cliff
Posts: 47
Peter,
A factor in the 2nd try with the spliced halyard not taken care of in the 1st double sheepshank try was the orientation of the bobble loop on the sail head cringle.
On a sheeve pulley mast, where the sheeve is in-line with the bolt rope slot, orientation of the bobble loop does not matter.
On the Aero: it may be better to ensure the halyard coomes down straight to the sail head bobble loop, i.e. not crossing over. This I took care over in the spliced halyard haul, not in the knotted haul. I can't imagine it makes any difference to the knot passing through the mast head eye, but it would make a small difference, an inch or so?, to the ultimate height of the sail.
In hindsight it sounds obvious, but is not metioned in the rigging guide.
Reply
28/12/2014 17:05:35
Jonathan Rickels
Posts: 104
Jonathan,
5mm is the normal. I rigged my boat up 2 weeks ago and tying a tight double sheet bend, as per the guide, I can get mine through with a tug at the right moment. At worst it takes a second tug. Make sure the tail of the 5mm is not too long as this will hinder dropping by being more likely to snag at the mast head eye.
Splicing/whipping for a smooth join is a nice upgrade and is likely to be fine by the Class Rules.
Note: the reason for the two lines is that the thin one is not only light and low windage but it is also a little stretchy. Thus if you tension it before launching then it will remain tight and not flap about after you bend the mast with the kicker and cunningham.
Peter
Reply

23/12/2014 00:11:31
Peter Barton
Posts: 4692
Supplied with Aero S/N 1141 was a Halyard Tail of 5mm diameter.
I found when knotting the Halyard Tail & Halyard using the Rigging Guide double sheepshank that the knot would only pass through the mast head eye if pulled at right-angles with the mast lying horizontal.
I found when knotting the Halyard Tail & Halyard using the Rigging Guide double sheepshank that the knot would only pass through the mast head eye if pulled at right-angles with the mast lying horizontal.
With any load on the tail, and the mast erected there was no way it would turn the sharp right angle into the eye.
Trying to pass it back through the tail would catch.
The clear plastic end bindings of this dual fibre woven rope dropped off.
I don't know whether I was supplied a tail of a larger diameter, but if anyone else has had similar a problem they might be intersted in the solution I came up with together with the Grafham chandler:
The main halyard, the fine 2 mm rope, was threaded down the centre of the tail for the length that would be free of the mast head cleat, & stitched to the tail,
The ends of the tail were whipped with whipping twine,
A drop of glue (UHU) was put on the whipping knots,
Heat shrink sleeves were put over the whipping at both ends of the tail & also over the halyard to further protect the whipping and also provide a more graduated transition from thin halyard to the 5mm tail.
With that and some silicone spray on the bolt rope slot the sail went up smoothly with a lot less effort, the halyard tail turned through the eye OK, & cleated in the mast head cleat OK.
With this arrangement replacing the tail will be more involved; given the sharp bends through the eye that are under load it will be a wear item. Though how long it will be before the tail needs to be replaced I shall have to see. Carrying a spare already made up could be a an option.
Has anyone else had this problem and come up with an alternative solution?
Jonathan
Reply
20/12/2014 18:21:50
Jonathan Rickels
Posts: 104